
Weebly > Editor Functionality > 1- Build
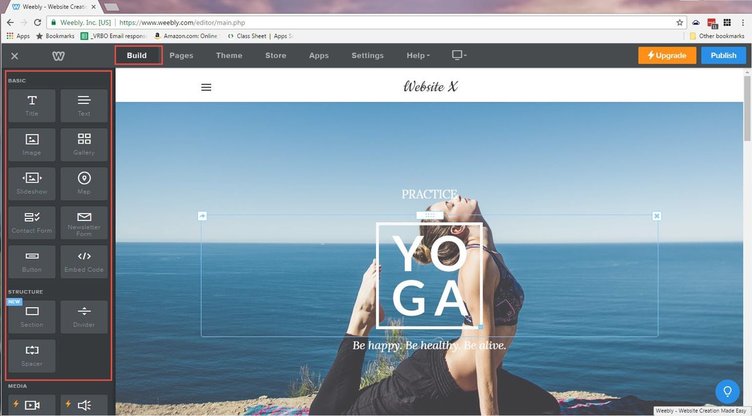
The FIRST item in the top, horizontal menu of the editor is the "Build" menu item.
The blocks on the left represent "objects" or "elements" you can incorporate into your website.
This is where you will spend the majority of your time when building and editing a website.
The blocks on the left represent "objects" or "elements" you can incorporate into your website.
This is where you will spend the majority of your time when building and editing a website.
"Basic" Objects/Elements
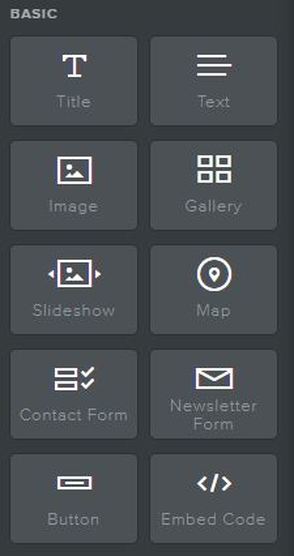
Image Repeated Below...
|
Title - The Title object should be named "PAGE SECTION HEADER". This has nothing to do with your website title. It's likely named for being page Title, but as you can see, I use it for much more than that. You will use this and the text object to its right the most.
Text - This text you are reading is in a text section. Note: every few paragraphs, start a new text section. When you or weebly accidentally deletes one you will thank me. Needless to say, my pages are filled with text sections. Image - This can be placed directly on a webpage in parallel with a title or text section, or it can in fact be embedded in a text section. After you place this space holder, click on it and you will be prompted to upload an image. I use this regularly. Gallery - This will enable you to upload multiple images at one time. All images will show in a grid. I've never used this before live. I haven't had a need to. |
|
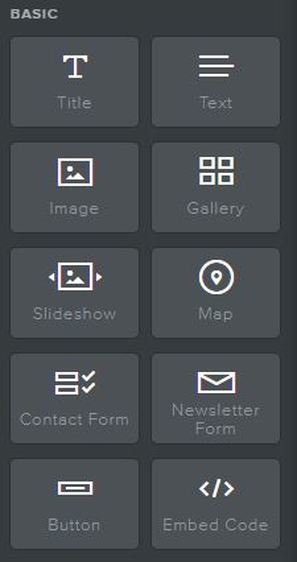
Slideshow - This can be placed directly on the page or embedded in a text section. You will upload an image after you place this on the page. Never used this before live.
Map - Map is a powerful tool that enables you to embed a map on your website. I use this occasionally. Contact Form - This is a very easy way to insert a contact form. Personally, I suggest you simply post your email address for starters instead. Never used this before live. Newsletter Form - The same as the contact form. I've never used it Button - Inserts a button. I can imagine you can assign custom javascripts to the button. That is a typical use. I've never used this before. Embed Code - You can embed custom HTML and javascript in webpages with this. This is how I insert I-Frames that display google Drive documents. I use this regularly although most won't unless embedding Google Documents or doing other advanced work. |
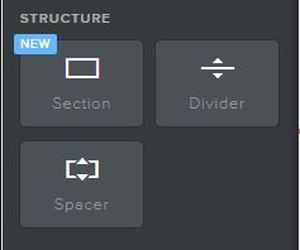
"Structure" Objects/Elements
|
Section - This provides a page wide stripe for color or content. I have not used in in production yet and probably won't as it's more graphically oriented than I prefer for my publishing.
Spacer -This adds an empty section to the page to provide space between other elements. It is adjustable vertically. As an alternative, I will often enter an extra carriage return at the end of a prior text box if possible. I use these sparingly. Divider - This inserts a thin horizontal line on the page. The line colors and size can only be modified via custom CSS modification. I use these occasionally. I'd use them more if the colors and thickness could be modified easier. |
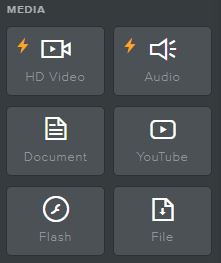
"Media" Objects/Elements
|
HD Video - I have not used this element. I have not used this. This is an advanced feature that requires a paid subscription for the website you are working with. I have used the embed code element and inserted HTML5 video elements into those to stream files directly from GDrive and that works well. I've also recently streamed Screencastify files from google drive and that is exceptional.
Document - I use this regularly to display PDFs. This will give you the iScribd viewer for displaying PDFs. Flash - I have not used. Audio - I have not used. Youtube - I have used regularly. Very easy and powerful. File - I use this occasionally. This is used to allow someone to download a file (as opposed to viewing it in your website). This is ideal for PDFs you want folks to download or word documents. GDrive documents will be inserted with regularly links. |
"Ecommerce" Objects/Elements
|
I have not used either of these yet. In general, Weebly might be a good place to start for ecommerce, but there are far more powerful systems for those with more complex needs.
|
"More" Objects/Elements
|
I have occasionally used the Block Quote element and I've used the Social icons one time.
|
"Installed Apps"
|
As can be seen, I've only installed 1 app and I do not use it. An "App" doesn't mean it "does stuff". it might just be a graphic block.
|